[React/NextJS] 무료 웹 에디터 CKEditor 사용하기

React에 CKEditor5 추가하기
React에서 많이 쓰이는 오픈소스 에디터들 중 두가지가 후보에 있었는데 하나는 CKEditor5고
https://ckeditor.com/ckeditor-5/
CKEditor 5 | Powerful Framework with Modular Architecture
Easy to customize RichText Editor with a powerful framework, a modular architecture, and modern features like Collaborative Editing.
ckeditor.com
나머지 하나는 Tinymce 다.
The Most Advanced WYSIWYG Editor | Trusted Rich Text Editor | TinyMCE
TinyMCE is the most advanced WYSIWYG HTML editor designed to simplify website content creation. The rich text editing platform that helped launched Atlassian, Medium, Evernote and more.
www.tiny.cloud
둘 다 클라우드도 지원되고 zip으로 다운로드 받아서 사용도 가능하다.
이 중에서 CKEditor로 선정한 이유는 가장 많이 사용되기도 하고 단순 image upload 기능을 custom해야하는 Tinymce와는 달리 기본적으로 지원해주기때문에 선정했다.
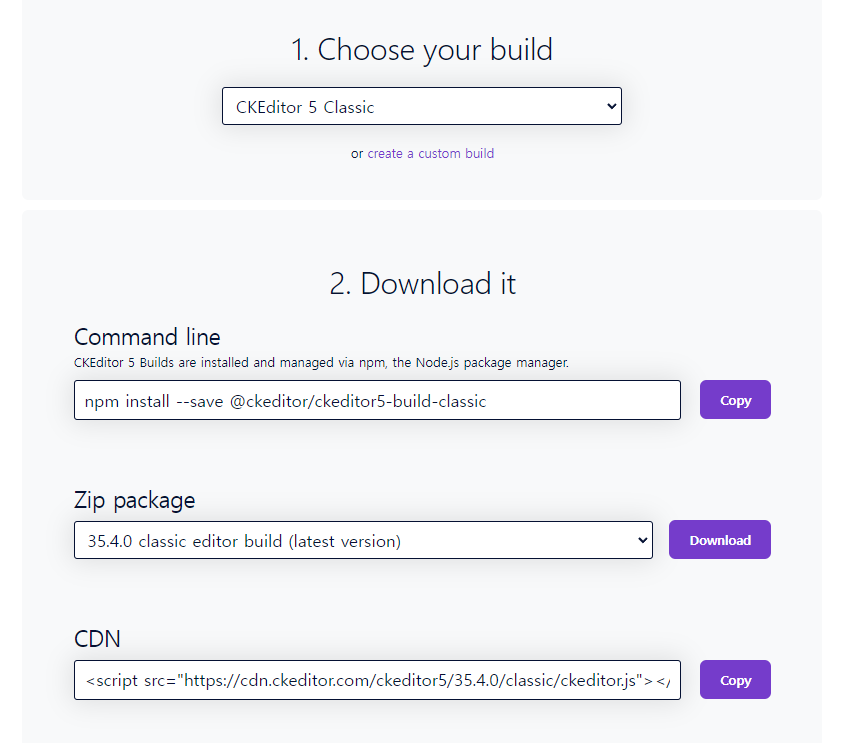
1. CKEditor5 설치
npm install --save @ckeditor/ckeditor5-react @ckeditor/ckeditor5-build-classic
npm으로 위 모듈들을 설치한다.
zip파일로 build된걸 다운받아서 설정하는걸 시도해보았으나 기존 next프레임워크와 충돌이 일어나서 그냥 npm package를 다운받기로 했다.
2. React Component 작성
그냥 일반적으로 import해서 사용할 경우 build된 모듈을 불러오기 전 dom에서 그리면서 에러가 일어난다. 따라서 useEffect()함수 내에 dynamic import 시켜 해당 모듈이 다 로드된 경우에만 dom에서 그릴 수 있도록 한다.
import React, { useEffect, useRef, useState } from 'react';

type Props = {
    initialText : string
}

const editorConfiguration = {
    toolbar: [ 'heading', '|', 'bold', 'italic', 'link', 'bulletedList', 'numberedList', 'blockQuote' ],
    heading: {
        options: [
            { model: 'paragraph', title: 'Paragraph', class: 'ck-heading_paragraph' },
            { model: 'heading1', view: 'h1', title: 'Heading 1', class: 'ck-heading_heading1' },
            { model: 'heading2', view: 'h2', title: 'Heading 2', class: 'ck-heading_heading2' },
            { model: 'heading3', view: 'h3', title: 'Heading 3', class: 'ck-heading_heading3' }
        ]
    },
};

const WebEditor = ({initialText} : Props) : JSX.Element => {
    const editorRef = useRef(null)
    const [editorLoaded, setEditorLoaded] = useState(false)
    const { CKEditor, ClassicEditor } = editorRef.current || {}

    useEffect(() => {
        editorRef.current = {
          CKEditor: require('@ckeditor/ckeditor5-react').CKEditor, // v3+
          ClassicEditor: require('@ckeditor/ckeditor5-build-classic')
        }
        setEditorLoaded(true)
    }, [])

    return (
        <> {editorLoaded ?
            <CKEditor
                editor={ ClassicEditor }
                config={ editorConfiguration }
                data={initialText}
                onReady={ editor => {
                    // You can store the "editor" and use when it is needed.
                    console.log( 'Editor is ready to use!', editor );
                } }
                onChange={ ( event, editor ) => {
                    const data = editor.getData();
                    console.log( { event, editor, data } );
                } }
                onBlur={ ( event, editor ) => {
                    console.log( 'Blur.', editor );
                } }
                onFocus={ ( event, editor ) => {
                    console.log( 'Focus.', editor );
                } }
            /> : null}
        </>
    );
}

export default WebEditor;
editorConfiguration으로 toolbar에 보여지는 기능들을 설정할 수 있다.
Interface EditorConfig (core/editor/editorconfig~EditorConfig) - CKEditor 5 API docs
CKEditor 5 API Documentation. The Interface EditorConfig. CKEditor configuration options. An object defining the editor configuration can be passed when initializing the editor: Check the Configuration guide for more information about setting configuration
ckeditor.com
Editor Config에 대한 정보는 위 링크에 나와있다.
3. 결과 화면
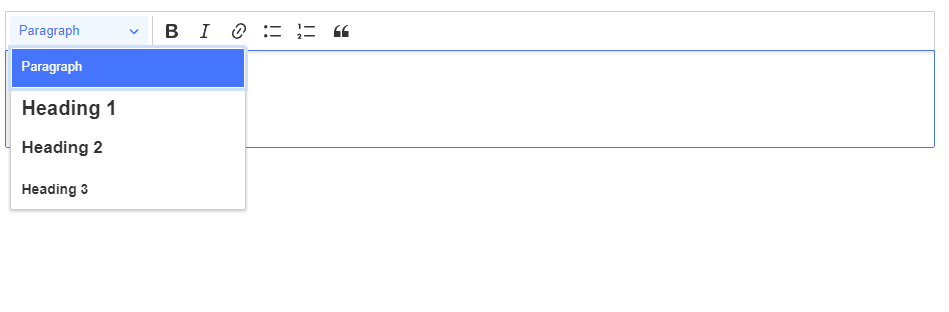
다른 Config들을 추가해야할 경우 추가적인 npm package가 필요할 수 있으므로 document를 꼼꼼히 살피도록 하자.
2023.01.26 - [개발 Study/React] - [React/NextJS] 웹 에디터 TinyMCE 사용하기
[React/NextJS] 웹 에디터 TinyMCE 사용하기
웹 에디터 TinyMCE 사용하기 지난번 CKEditor로 image load까지 커버하려고 했으나 webpack 설정 및 다른 plugin을 사용할 경우 dependency가 더 복잡해지고 파일 수 및 용량도 많아져 좀 더 가벼운 TinyMCE로 대
chuun92.tistory.com